What is a user?
A user in Powerdrill Enterprise is an individual who has access to a workspace within the Powerdrill Enterprise environment.
User types
Powerdrill Enterprise Edition provides three types of users, each designed with varying permissions to meet diverse requirements:
-
Team member: A team member is a user with full access to all features on the console. They collaborate with other team members, managing and interacting with data within the projects they are part of.
Team members can perform the following operations in projects where they hold membership:
-
Create and manage datasets and data sources
-
Run jobs based on the datasets
-
Collaborate with other team members
Team members are ideal for teams using Powerdrill Enterprise as their AI-driven data analytics platform, empowering each individual to optimize data analysis based on their personalized needs.Team members do not have access to the Powerdrill Open API, as it is unnecessary for their role.
-
System user: A system user can utilize the Powerdrill Open API to run jobs in large batches, but does not have access to the memory feature.
System users can perform the following operations in projects where they hold membership:
-
Leverage Powerdrill Enteprise’s AI capabilties via API calls.
-
Run jobs in batches efficienctly.
-
Develop custom solutions via the Powerdrill Open API to serve their users.
System users are ideal for your organization’s developers, data engineers, and technical personnel who need to automate tasks, run jobs in large batches, or integrate Powerdrill’s AI capabilities into their custom applications. They are best suited for scenarios requiring API-driven operations or secondary development to extend services to end-users.
-
Virtual users: A virtual user can use the Powerdrill Open API to run jobs, with access to the memory feature.
Virtual users are best suited for external customers or clients of your organization who need controlled access to specific features of Powerdrill. They are ideal for scenarios where users require API-based functionality along with access to the memory feature. Virtual users ensure a secure and tailored experience without exposing unnecessary details about Powerdrill.
Create a user
Perform the following steps to invite users to join in your project:
-
Sign in to Powerdrill.
-
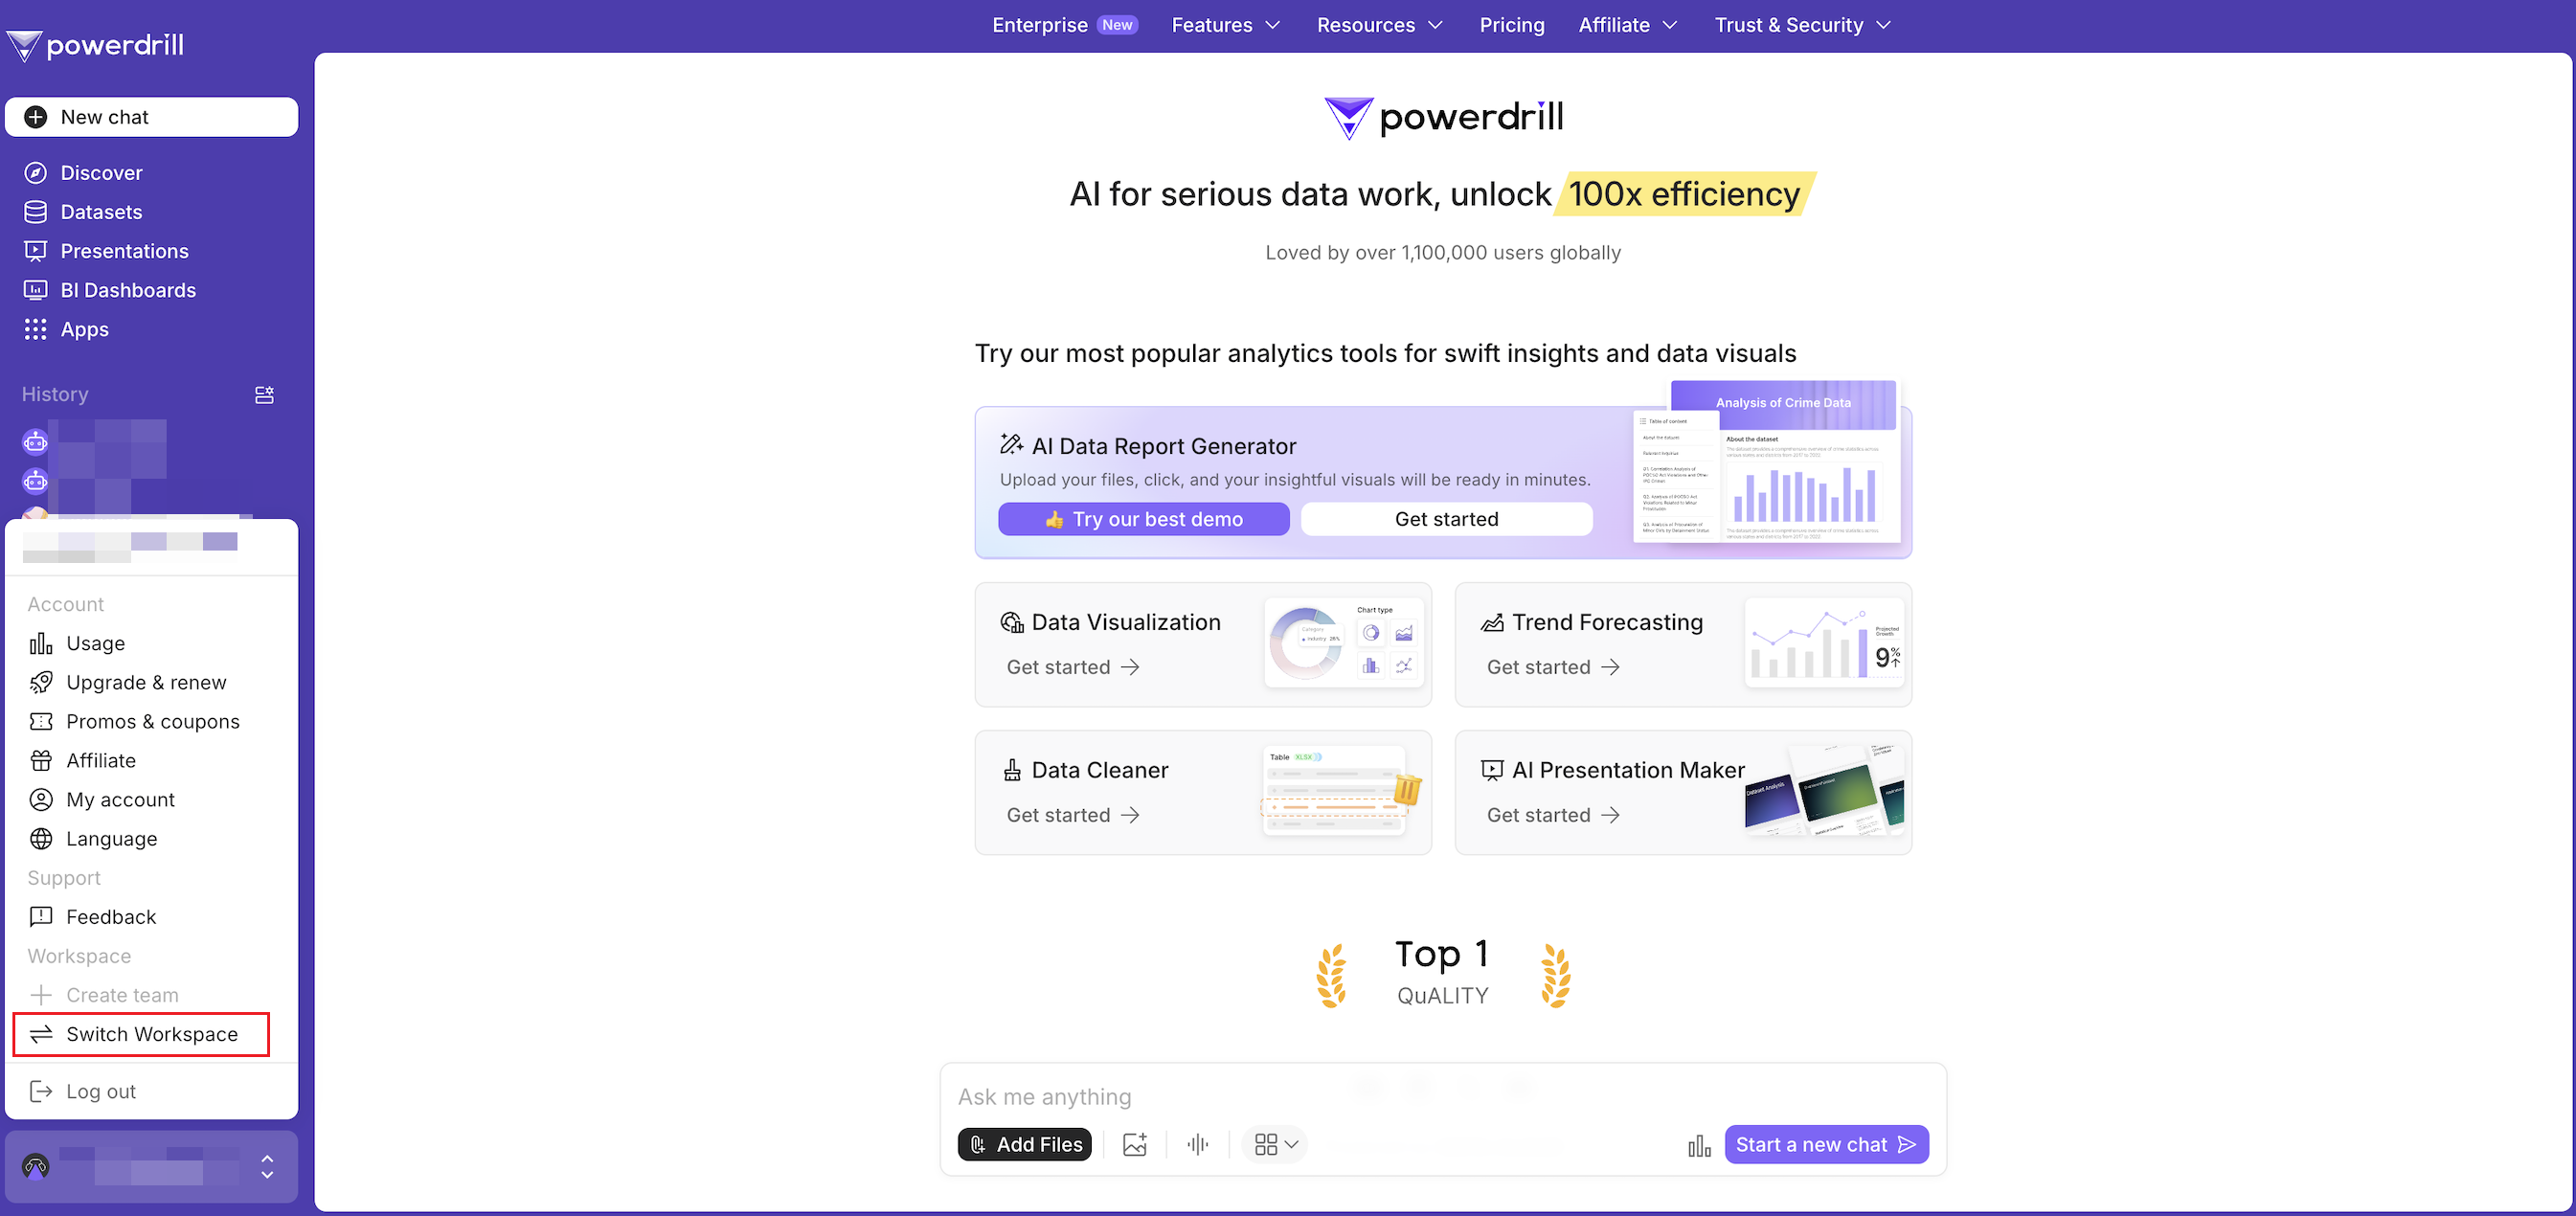
Click your profile icon in the lower-left corner.
-
In the menu, go to the Workspace section and click Switch Workspace.
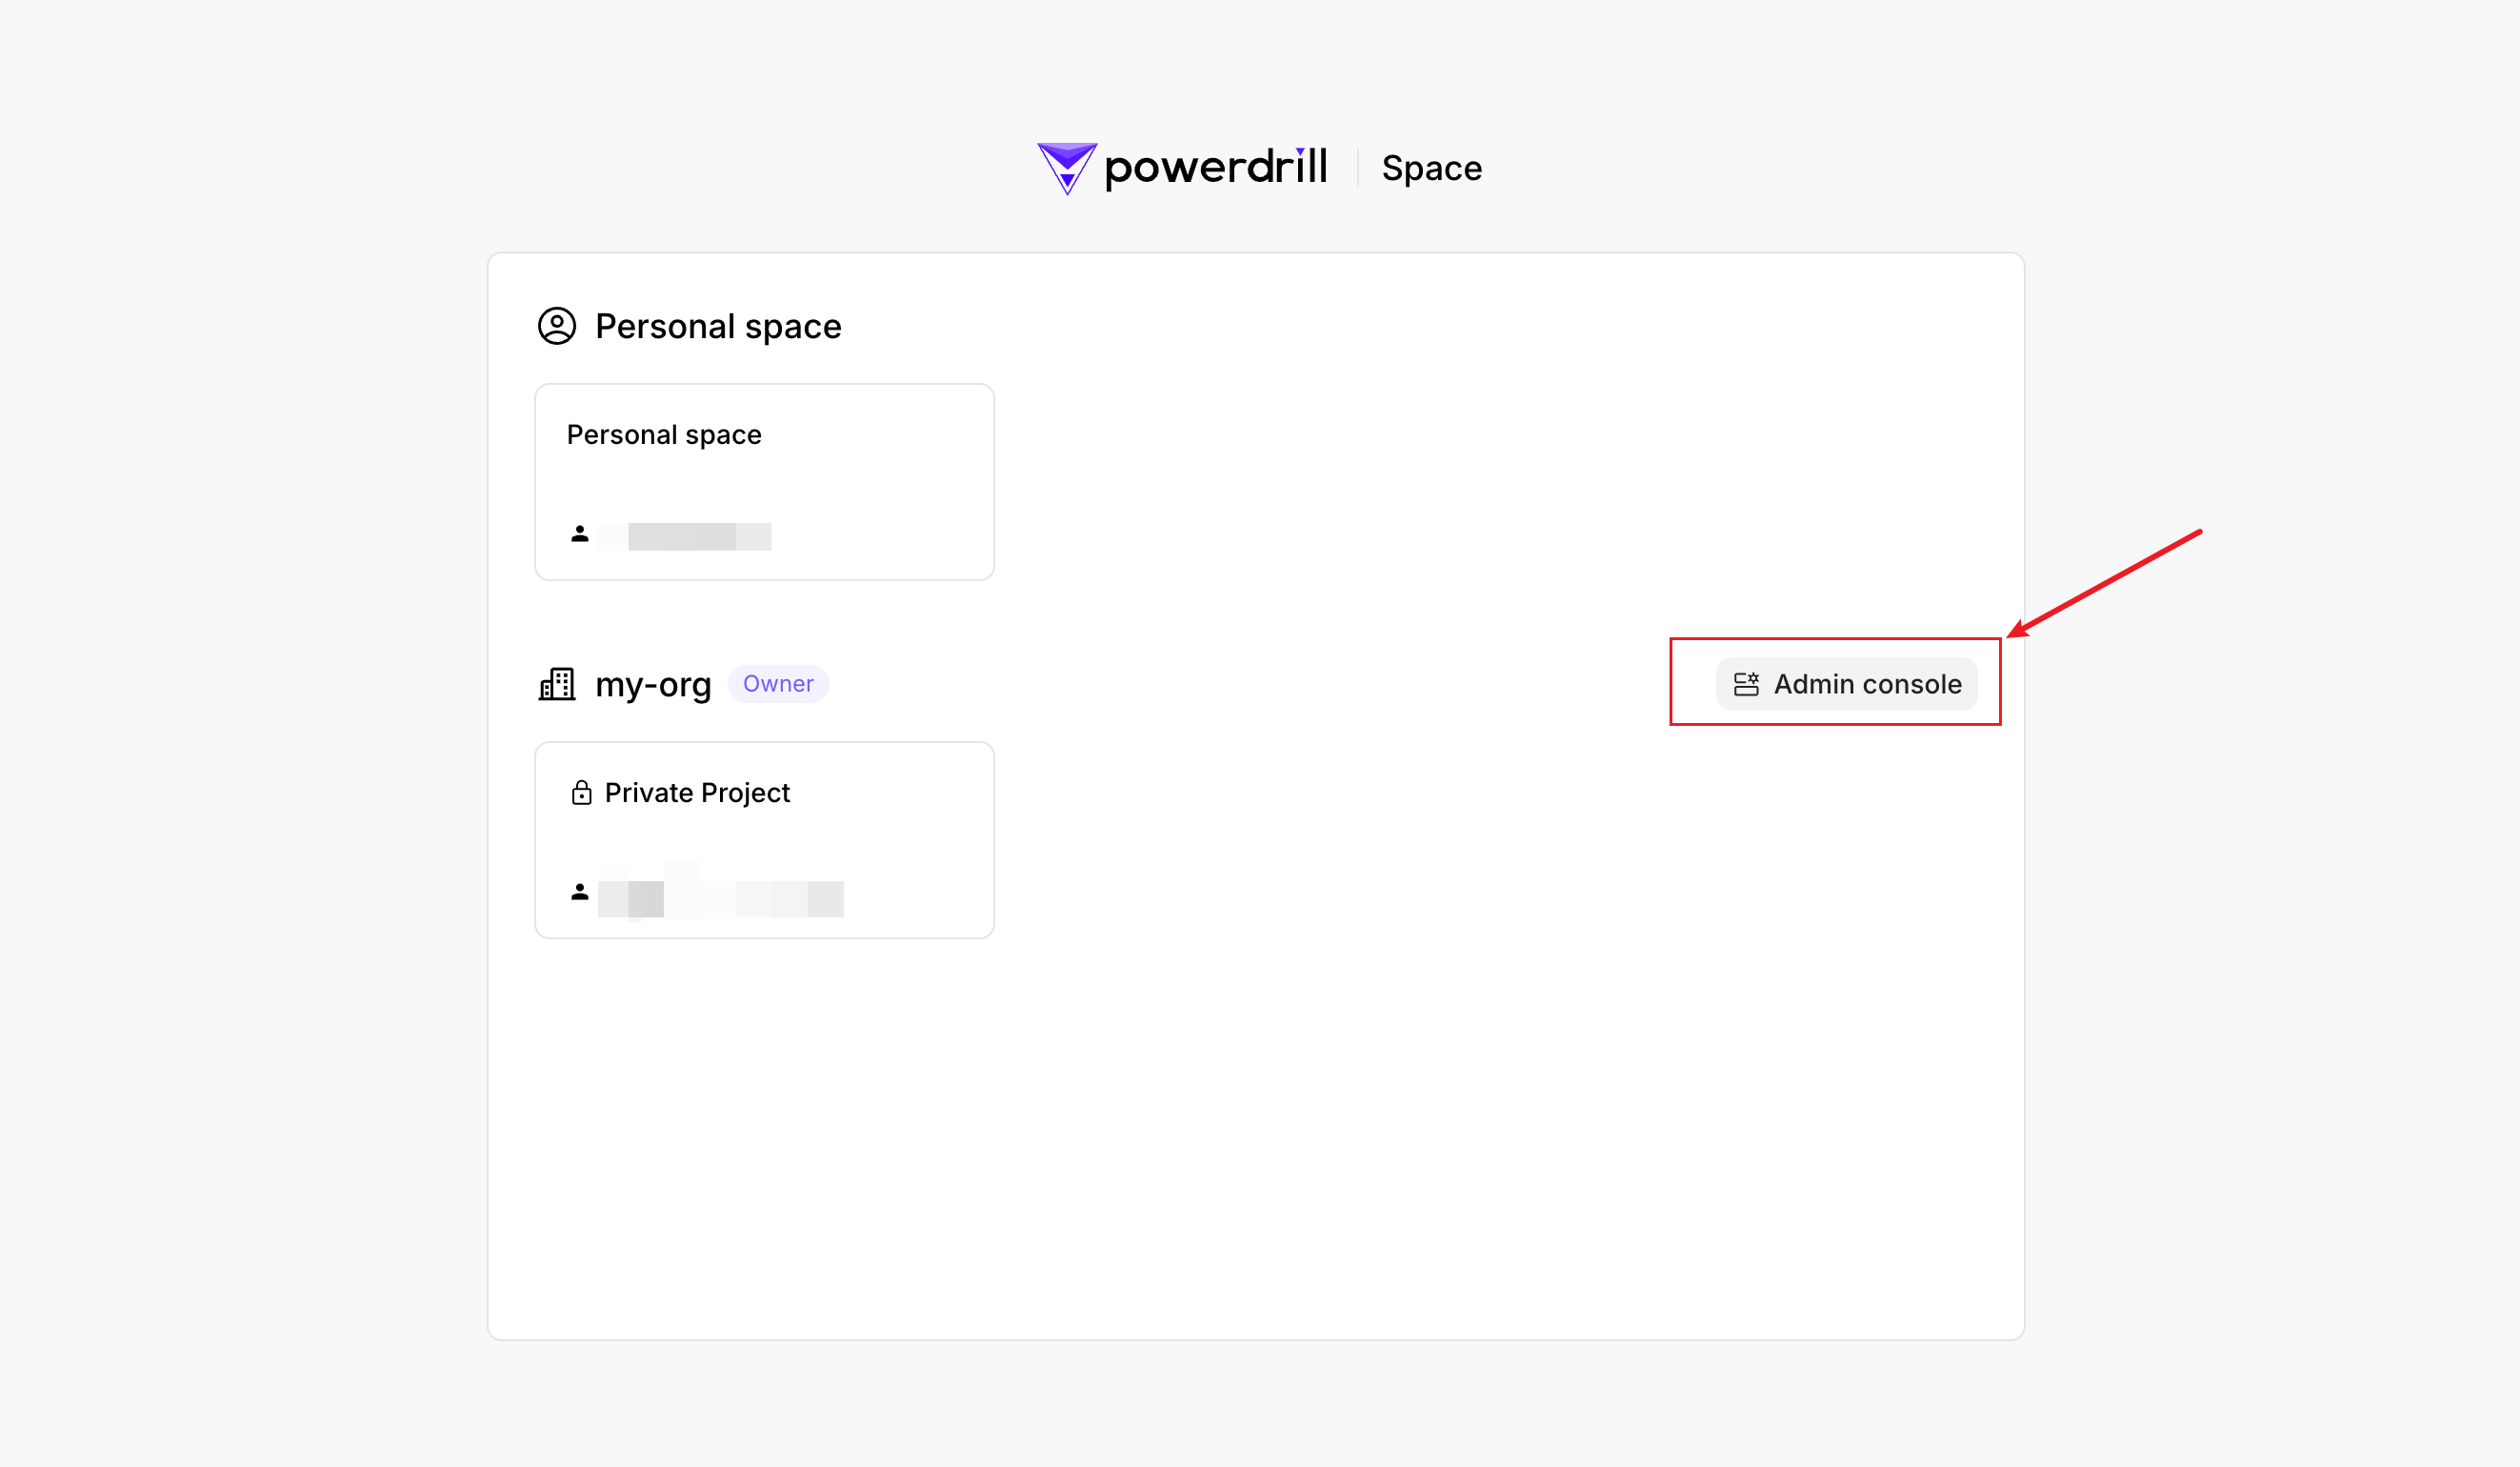
A list of all the workspaces you’re in will appear.
-
Click the Admin console next to the team that you own.
-
On the top-navigation bar, select Users. On the Users page, click Create user.
-
On the Create user page, select the user type you want to create, configure user information, and click Create.
For details about how to select the user type, see User types.
Create a team member
Create a system user
Create a virtual user
Parameter description:| Parameter | Required | Description |
|---|
| Email | Yes | The email address of the invitee. |
| Associate plan | No | The subscription ID the user will be associated with. Only users associated with a plan can run jobs. |
| Add to projects | No | Select the projects you want the user to join. Users can perform operations only in projects where they hold membership. |
Parameter description:| Parameter | Required | Description |
|---|
| Display name | Yes | The identifier that represents the user publicly. |
| Associate plan | No | The subscription ID the user will be associated with. Only users associated with a plan can run jobs. |
| Add to projects | No | Select the projects you want the user to join. Users can perform operations only in projects where they hold membership. |
If you create a team member, you can view the user information only after the invitee accepts your invitation.
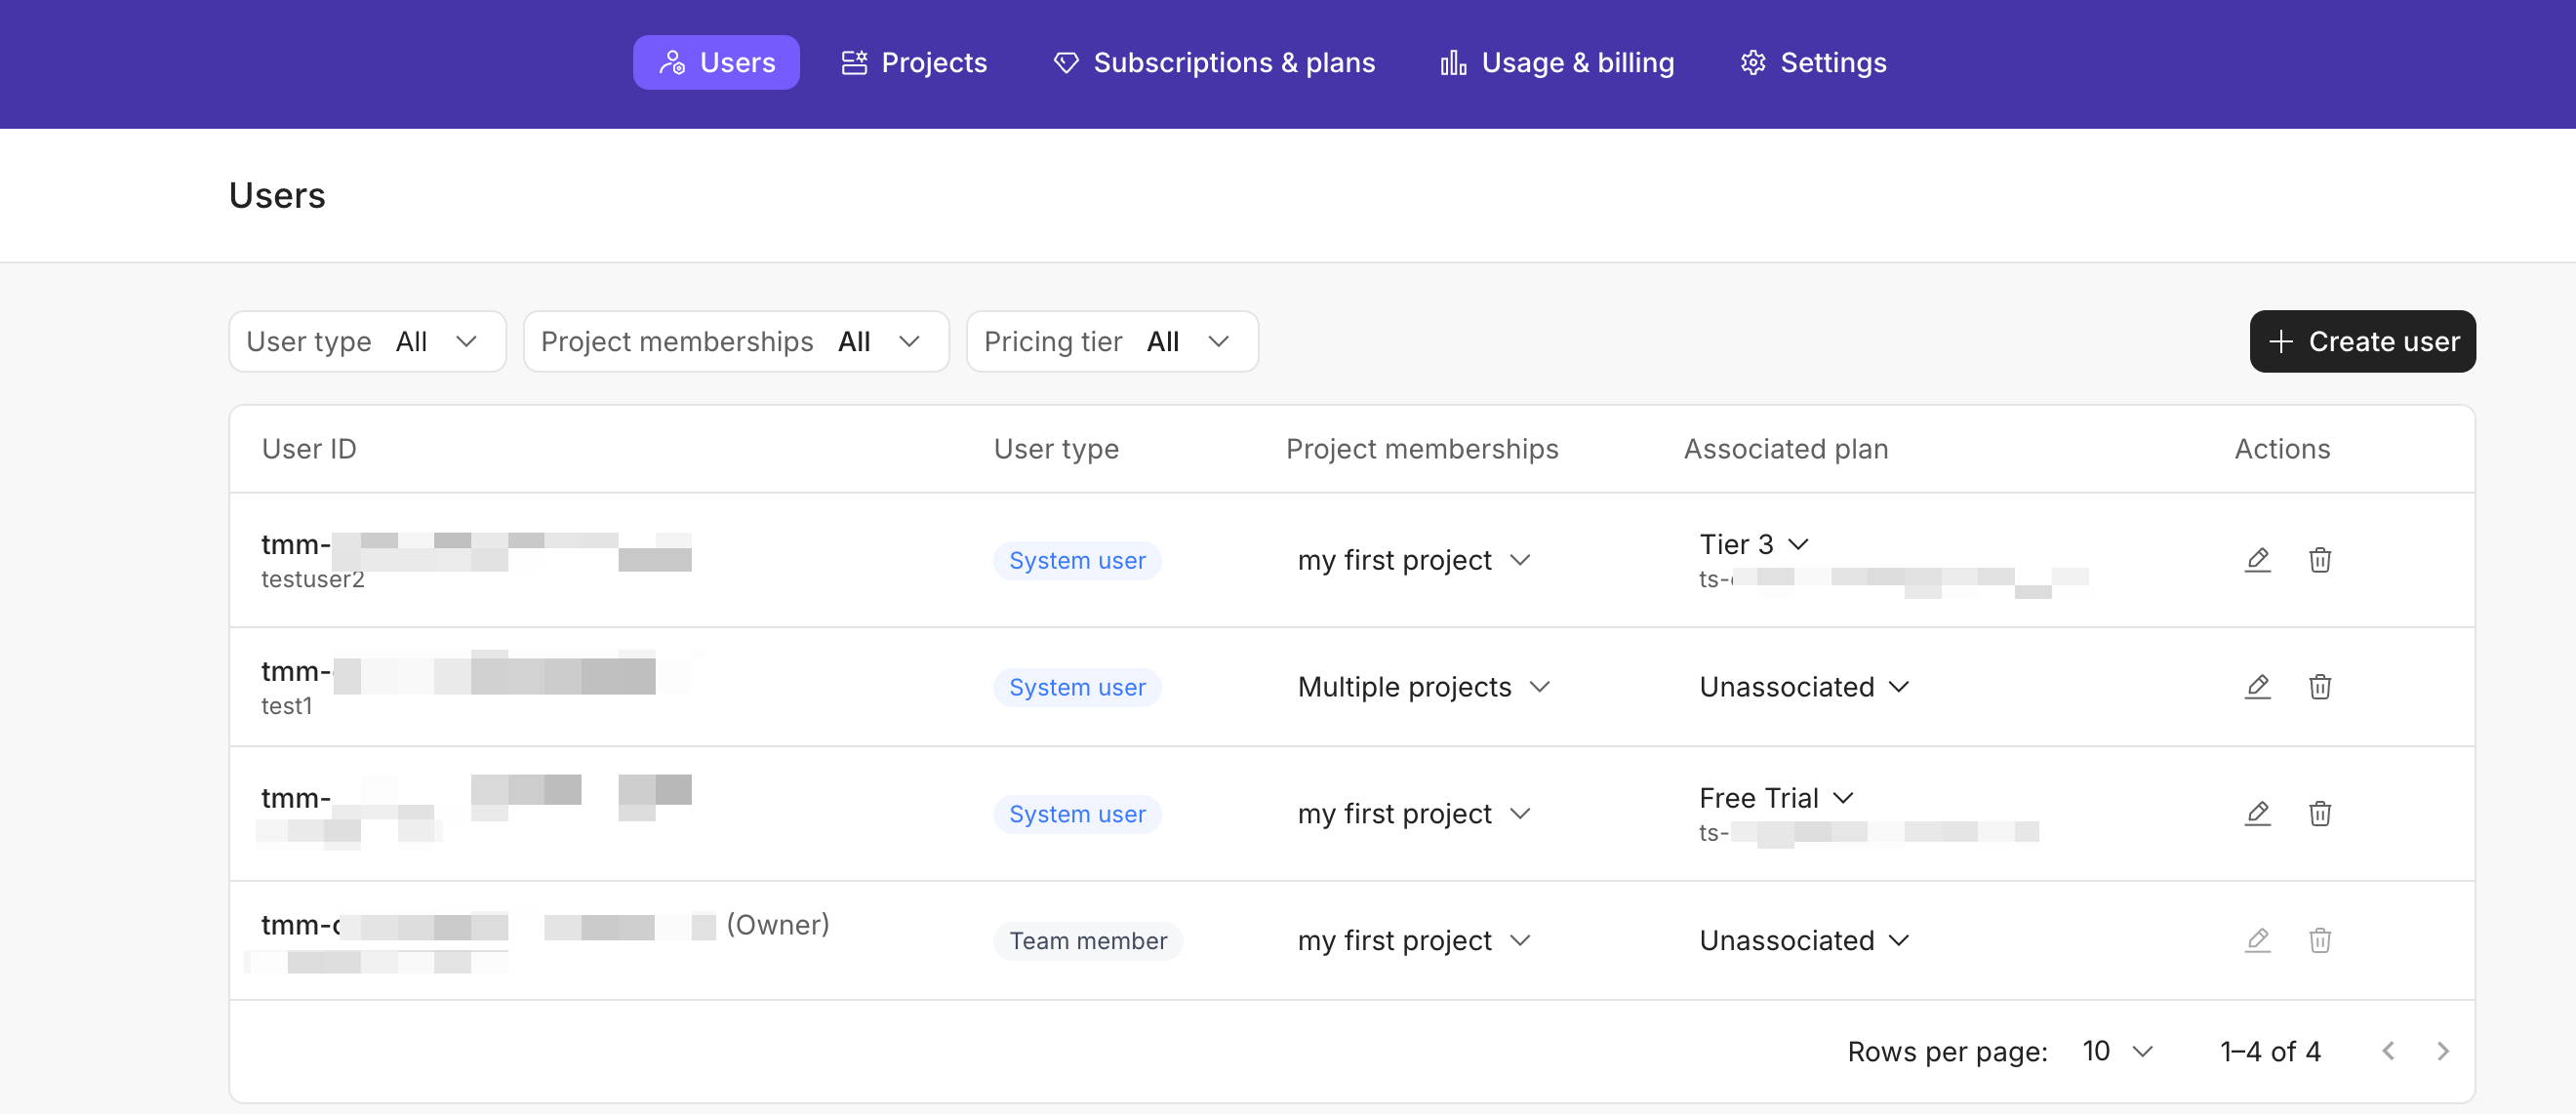
You can check information about each user existed in your team.
In this list, you can check the following information:
| Field | Description |
|---|
| User ID | The ID and username/display name of the user are displayed. The user ID serves as the unique identifier for a user within your team and is prefixed with tmm-. If the user is a team member, their username is shown. For system or virtual users, their display name is shown instead. |
| User type | The user type, which can be one of the following: Team member, System user, or Virtual user. For details on the differences, refer to User types. |
| Project memberships | A list of projects that the user is in. |
| Associated plan | The pricing tier and its corresponding subscription ID associated with the user. The subscription ID is prefixed with ts-. |
| Actions | Actions that can be performed on the user. |
Manage project memberships for a user
On the Users page, you can add a user to or remove a user from projects.
Users not added to any projects will face the following limitations when using Powerdrill Enterprise:
- Unable to upload data sources or create datasets.
- Cannot specify datasets for question answering.
Therefore, we highly recommend you to add users to the appropriate projects to fully utilize Powerdrill Enterprise’s data analysis capabilities.
Manage the subscription for a user
You can associate a user with a subscription to grant them job credits for processing data tasks on Powerdrill. You can also unassociate the subscription from the user to prevent them from consuming the job credits provided by the subscription.
Only users linked to a subscription can run jobs in Powerdrill Enterprise. To know more about managing your subscriptions, see Subscriptions.
-
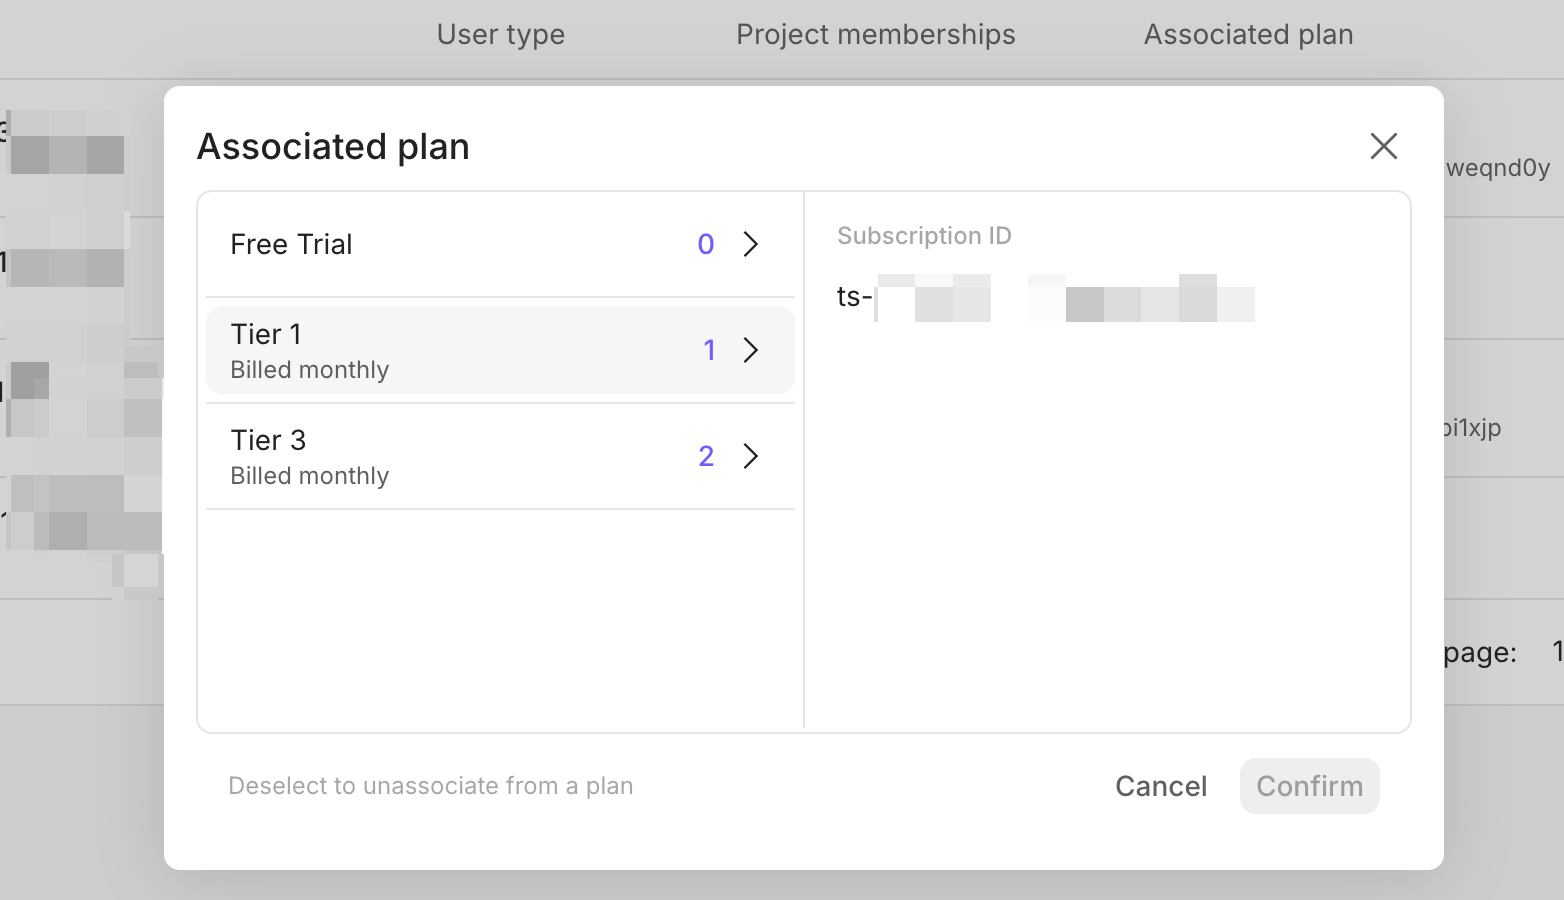
On the Users page, locate the target user in the list and click the Expand icon in the Associated Plan column.
-
In the dialog box that appears, select the pricing tier and the ID of an unassigned subscription, then click Confirm.
To unassociate a subscription from a user, simply deselect the assigned subscription and click Confirm.
Delete a user from your team
You can remove unnecessary users from your team. Once a user is removed, their associated subscription will be released and can be reassigned to another user.
Once a user is removed, all data associated with them will be deleted. This action cannot be undone. Proceed with caution.
-
On the Users page, locate the unnecesary user, and click the Delete icon in the Actions column.
-
In the confirmation dialog box, click Yes, revoke.
Need more help?


